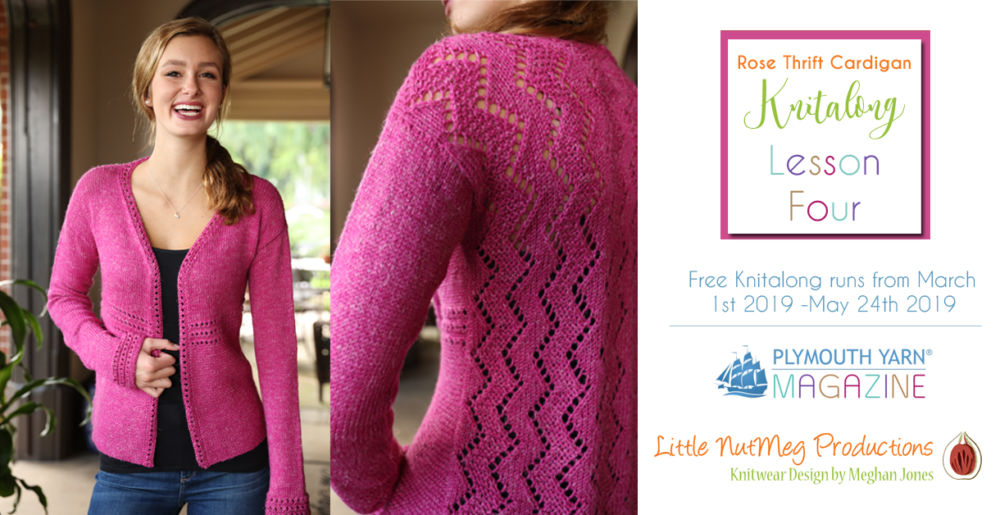
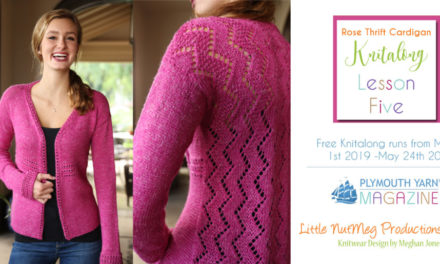
Welcome to the Rose Thrift Cardigan Knit-along
Hosted by Plymouth Yarn Company and Meghan Jones of Little NutMeg Productions.
Join me (Meghan) as we work through every step of the gorgeous Rose Thrift Cardigan from planning to finishing and make yourself (or a friend) a spectacular knitted cardi!
In the First Lesson, we took a look at the schematic, chose what size to knit based on measurements and talked about easy adjustments that could be made with needle sizes. If you missed that lesson, check it out here! Lesson 1
In the Second Lesson, we really delved into sizing for the fronts including changing needle sizes and possibly even changing the stitch counts, as well as where to place the eyelet band and working the garter stitch rows from the blocked swatch. If you missed that lesson check it out here! Lesson 2
In the Third Lesson, we blocked the fronts and the back and then calculated joining rows to seam the differing stitch counts on the front shoulders to the back shoulders. If you missed that lesson, check it out here! Lesson 3
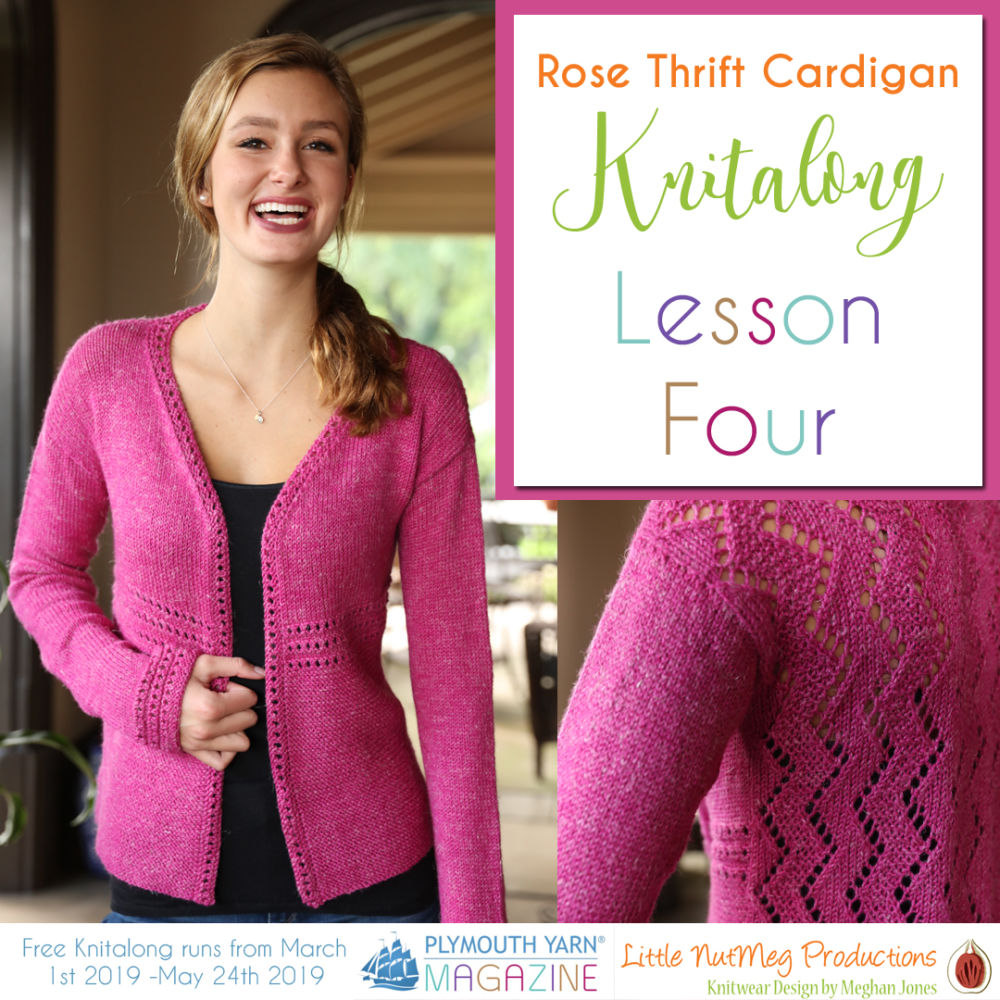
Lesson 4
For this lesson we will be double checking the length required for the sleeves, making any adjustments to the math that are required and then working out a perfect pickup rate for the armhole openings.
Sleeve Length
Have you ever knit a sleeve for a garment and had it be either way too long or way too short? Ever wondered why the plus sizes in a pattern call for sleeves that are longer than the smaller sizes in a pattern? I mean we all know that how wide around you are does not affect how long your arms are, it can affect the circumference of your upper arm quite a bit, but not the length. Patterns used for publication are supposed to adhere to a standard set of guidelines set out by the Craft Yarn Council, you can see those guidelines and accompanying info if you are interested by clicking here: Craft Yarn Council.
Those guidelines state that the sleeves should be a certain size which makes sense when the goal is to provide a level of standardization across a wide ranging and creative industry. But when we get into looking at a specific pattern and really want it to fit we need to look at the schematic versus our own measurements and see what kind of a sleeve we need to make. For me personally my short little T-Rex arms are 2 inches less than the average length noted for my 3x size, (don’t worry, I can still do pushups and feed myself with my hands unlike the real T-Rex… poor guy!). So I consistently need to remove length from sleeve patterns which means rewriting the shaping rows to be worked more frequently, fitting more shaping into less length. We are going to take a look at what length is needed for the sleeve versus what length is noted and get them to match up for a perfect fit!
Measuring
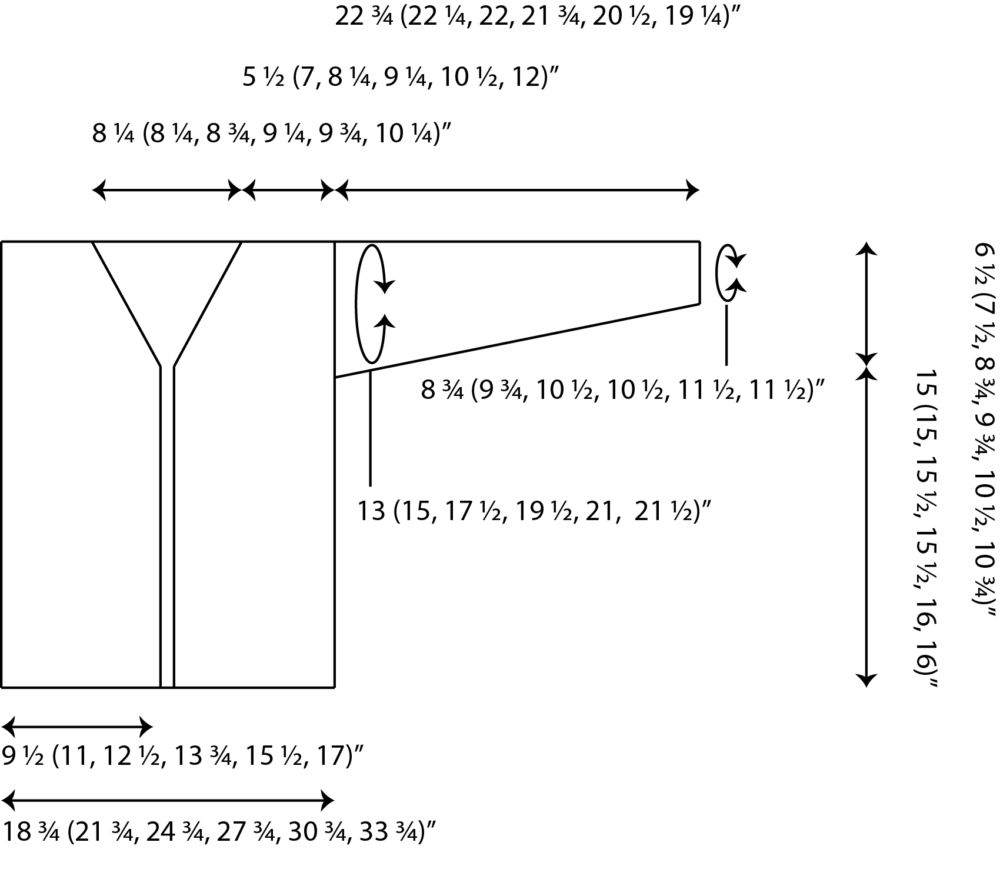
Because the Rose Thrift Cardigan is a drop shoulder the total sleeve length is actually calculated as the sleeve plus the shoulder width to the center back neck. So we will need to have finished width of the upper back which we will then divide by 2 to decipher the shoulder plus the half neck.
- My upper back after using the smaller needle size was 26 ½ inches wide.
- Divide that by 2 and I have 13 ¼ inches from the center neck to the edge of the upper back.
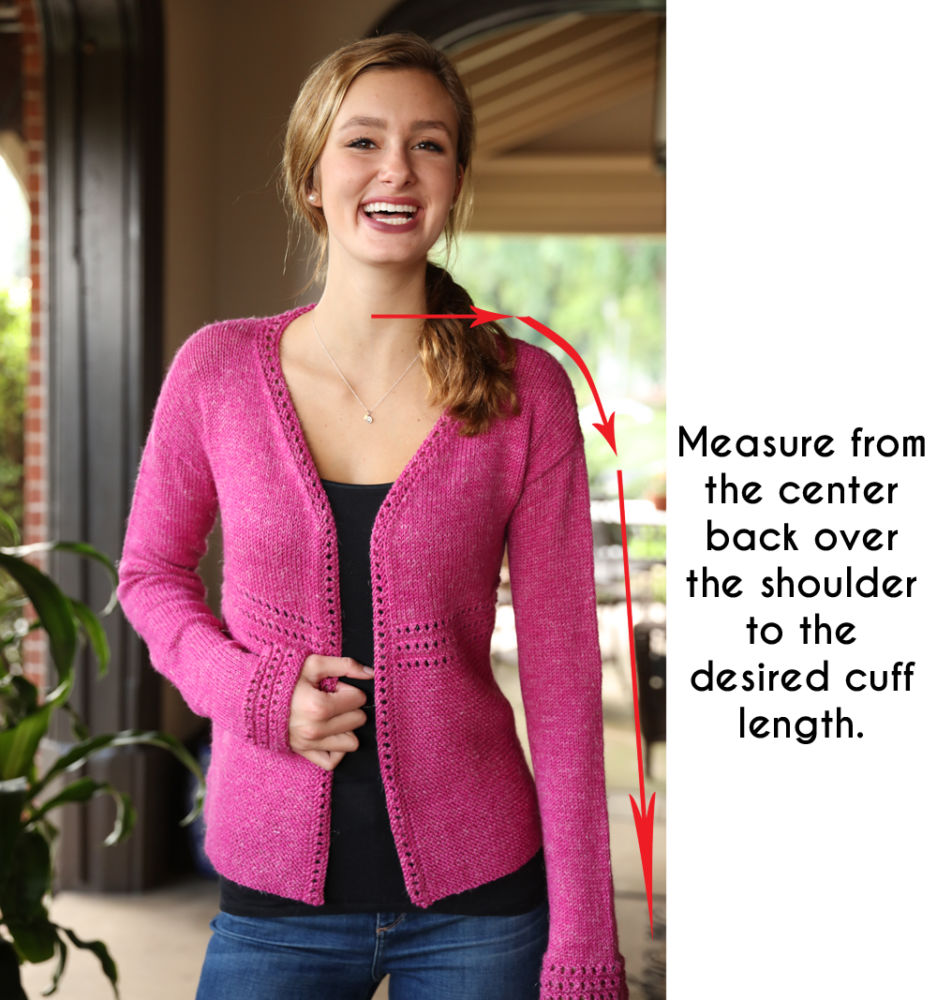
Now Take your measuring tape and hold it at the center of your back neck, let it run across your shoulder and down to your wrist with your arm down.
For me this measurement is 30 inches, BUT I really want to have ¾ length sleeves so I am going to minus 2 inches from that measurement for a total of 28 inches.
- Take the total length (28 inches) and minus half the upper back from it (13 ¼ inches) = 14 ¾ inches
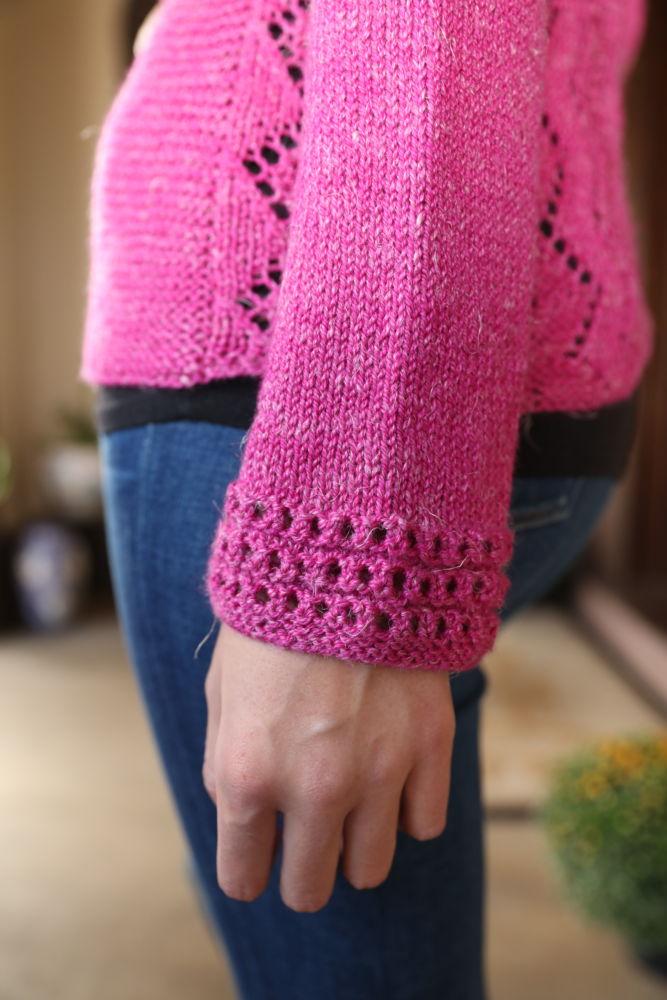
While we are hanging out with a measuring tape, take the circumference measurement for the wrist or upper arm where you want the cuff to sit, deciding how close you want the end of the sleeve to fit. It helps to try on a favorite sweater and see what the finished measurements are for one you already love, just write this number down for now.
Check the Schematic
Take your desired total sleeve length and wrist circumference and check them against the schematic, if they fit go ahead and work from the sleeve patterns as written! You can skip ahead to the photo tutorial below on how to calculate a perfect pickup for the sleeves. If you need to alter the length or wrist circumference or both then read on for more info.
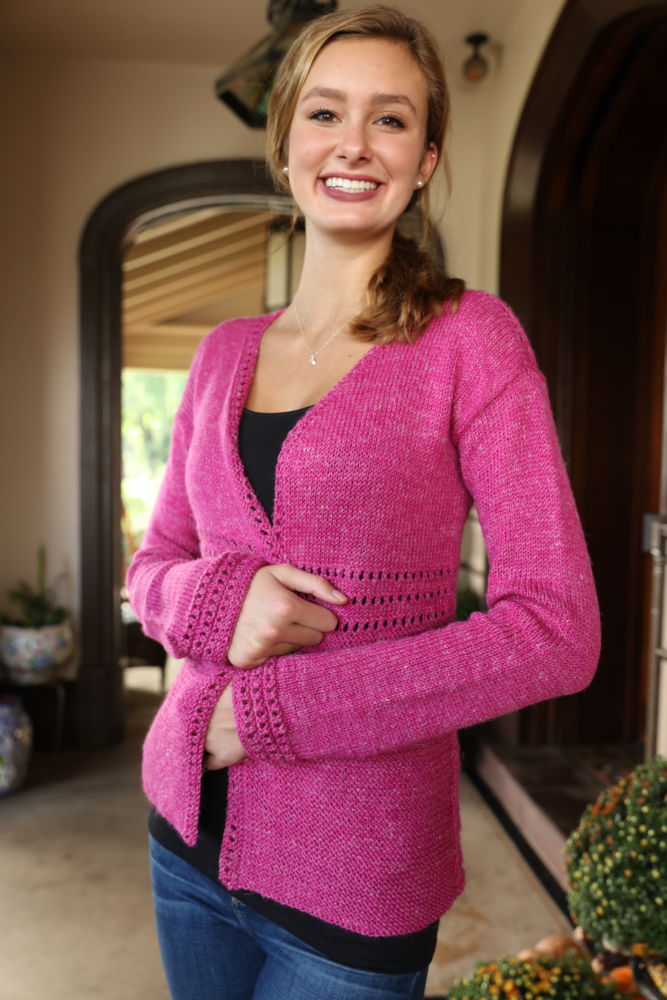
The Cuff
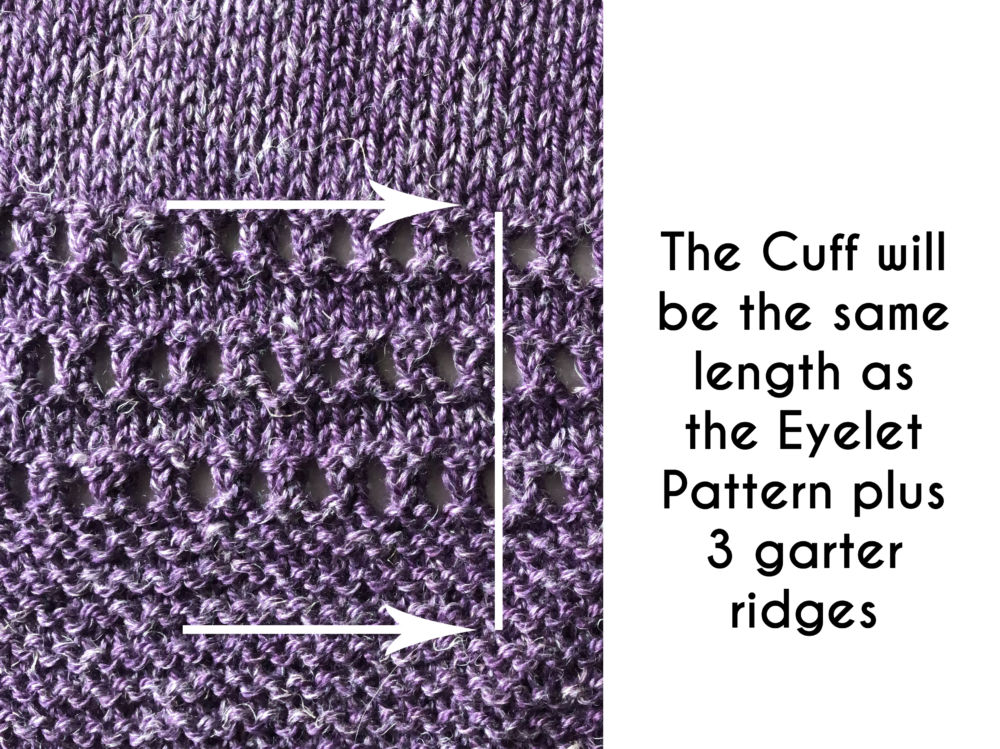
First we will see how much length we have to work decreases in which means taking the total length and removing the cuff rows from it. The cuff on the Rose Thrift Cardigan is the same pattern as the eyelet band used on the fronts, GREAT NEWS! You already know exactly what size that will be when finished and blocked, so measure it including 3 garter ridges from the lower body and then minus that measurement from the total length, mine was 2 ½ inches.
- 14 ¾ inches minus 2 ½ inches = 12 ¼ inches to work any shaping in.
The Stitch Counts
The Upper Arm circumference for this sweater is twice the armhole depth, if you are working from the pattern and did not alter the armhole depth then find the pickup number of stitches for your sizes noted under Sleeves.
If you altered the armhole depth in any way you will need to calculate a new armhole pickup, click the dropdown menu for more information
How to calculate a new armhole pickup.
Now check the wrist circumference you desire against the schematic, if the stated wrist circumference works for your desired measurement you will not need to change the number of decreases, just the number of even rows between them, write down the number of decreases noted for your size and see the next section for this alteration.
If you are changing the cuff circumference in any way you will need to calculate a finished cuff stitch count, click the drop down menu for more information
How to calculate a new finished cuff stitch count.
- My stitches per inch over the eyelet pattern is: 20 sts / 4 inches = 5 stitches / 1 inch.
- 10 inches of cuff circumference multiplied by 5 stitches per inch = 50 stitches (this number must be an even number to fit the cuff pattern properly, manipulate it as needed).
- Now minus the cuff stitches from the armhole pickup stitches, for me this is 98 – 50 = 48 stitches to decrease.
- Divide this number by 2 (since we are going to decrease 2 stitches per decrease round) = 24 decrease rounds are needed.
Altering the Decrease Schedule
Now we know the how much length we have to work decreases in, and how many decreases we need to work, so let’s put the two together!
- Take your total length to work shaping in (center neck to cuff measurement – half upper back –cuff length) = 12 ¼ inches for me
- Multiply this number by your Rows per inch over stockinette (26 rows / 4 inches = 6 ½ rows /1 inches) 12 ¼ inches of total sleeve length multiplied by 6 ½ rows per inch = 79.625 rnds rounded up to 80 rnds.
- Divide your total rnds by the total number of decreases (upper arm stitch count – cuff stitch count / 2) 80 rnds divided by 24 decrease rnds = 3.333 rnds in between.
Now normally if we are working flat a decrease every 3 rows would be awkward and not very nice to keep track of. But since we are working in rounds, a decrease every 3 rnds is not a big deal. However we still need to find out what remains to work evenly since 3.333 rnds and 3 rnds are not the same.
- Total number of decreases multiplied by whole number of rounds per decrease, 24 decrease rnds multiplied by 3 rnds per decrease = 72 rnds needed for decreases
- 80 total rounds for length – 72 rnds needed for decreases = 8 even rnds remaining.
So for my sleeve I will work the pickup round, (this counts as a round), then work 7 even rnds, then work 24 decreases every 3 rnds (2 even rnds and 1 dec rnd), then work the cuff pattern.
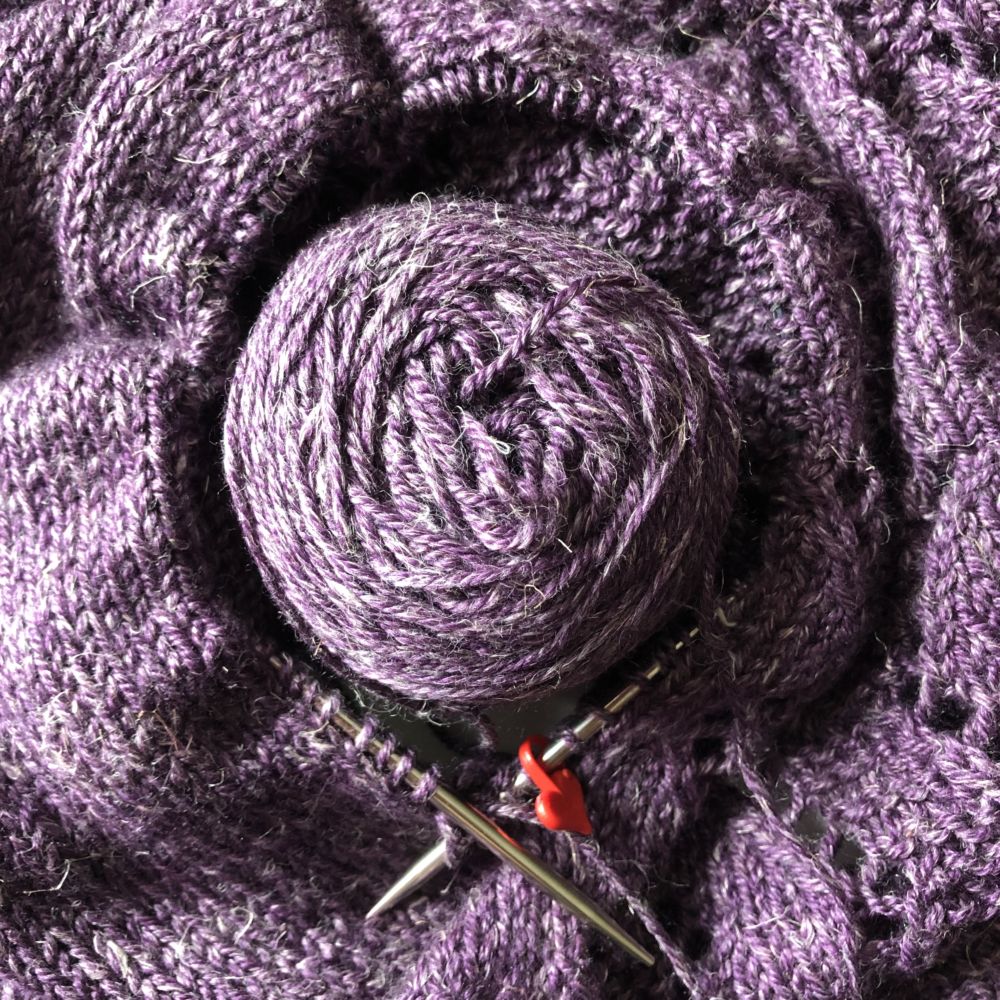
Picking up the stitches
Just like when we calculated the single seamed stitches versus double seamed stitches for the fronts and back in Lesson 3 We will also make a calculation for the sleeve pickup so that we only need to pickup stitches one time, ONE TIME I SAY! So many knitters I know hate to pickup stitches since it always seems to take more than one try, but with the power of math we can make a calculation and know exactly what to pickup from our armhole openings. This is especially important since the fronts and back are at a different rows per inch count since we are picking up from stockinette for the fronts and the lace pattern for the backs.
First, we are going to count how many spaces to pickup are in each armhole depth, I recommend actually counting them instead of using your rows per inch over the armhole dept because you lost at least a rows per side when seaming the shoulders, and your gauge might have been a row different.
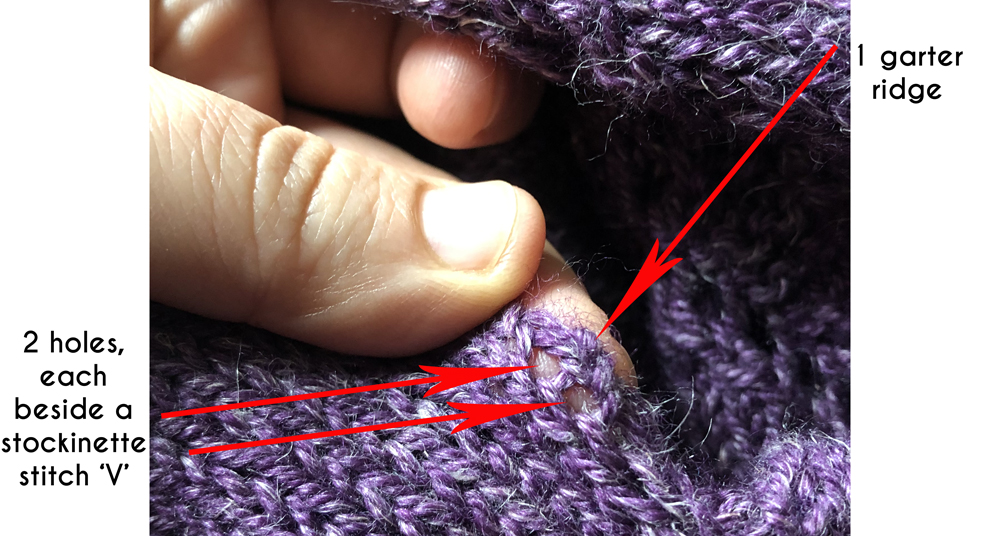
Start by looking at the garter stitch selvedge of the fronts, there are two holes in between each garter stitch, or one hole for each stockinette stitch. Count how many there are for each front and back armhole.
I counted 60 for each Front and 62 for each Back, (because I used a smaller needle size for my upper back I have more rows in the armhole, if you did not make any alterations to needle size your number for the back should be smaller). I know my total pickup for the sleeve is 98 sts, which I am going to divide into two sets of 49.
Calculation for My Front Armhole
- Take the total number of holes for the front armhole length, and minus one set of the stitches to pickup (half the total armhole pickup since we are just picking up the front at this moment), for me that looks like: 60 – 49 = 11 à this is the number of holes I am NOT going to pick up into.
- Take the total number of holes and divide it by the number of holes not being worked into: 60 / 11 = approximately 5.5
- Minus 1 whole stitch from this number for the hole you are skipping: 4.5
- 5 can’t work so I will either use 4 stitches or 5 stitches, So I will work 4 sts then skip a hole and then 5 sts and skip a hole
- My pickup will look like this: 4 skip+5 skip+4 skip+5 skip+4 skip+5 skip+4 skip+5 skip+4 skip+5 skip+4 skip = 11 skips and 49 sts over 60 holes (add the sets of stitches and skips up to make sure you will end up with the correct pickup number)
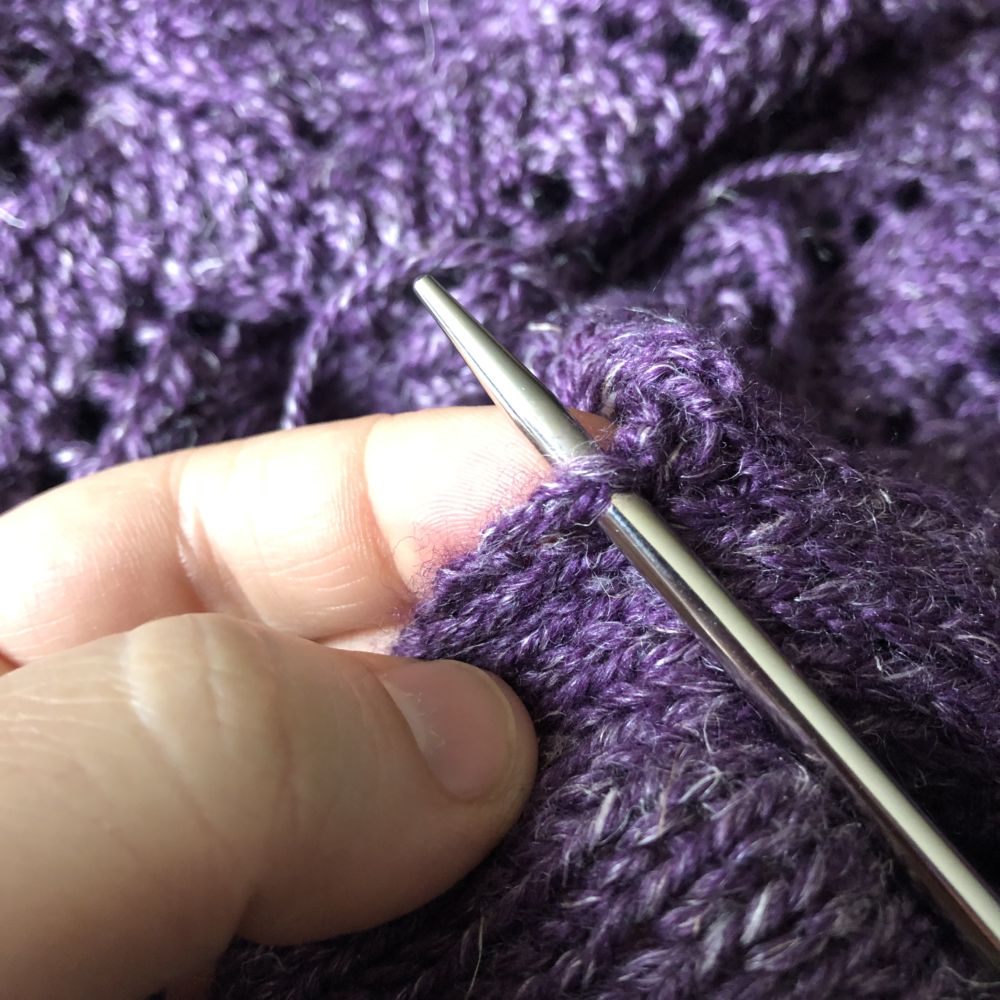
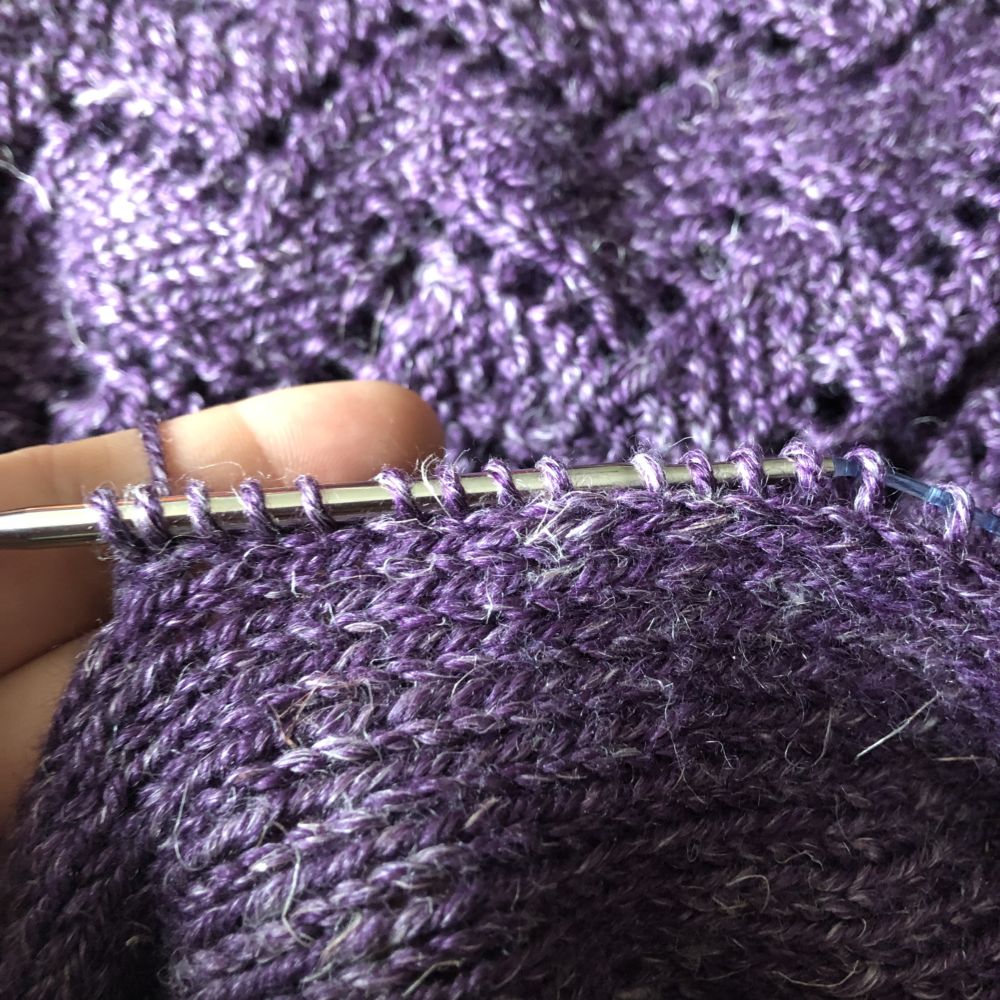
So I will insert the needle into the first hole, leaving a tail about 5 inches long to work in later.
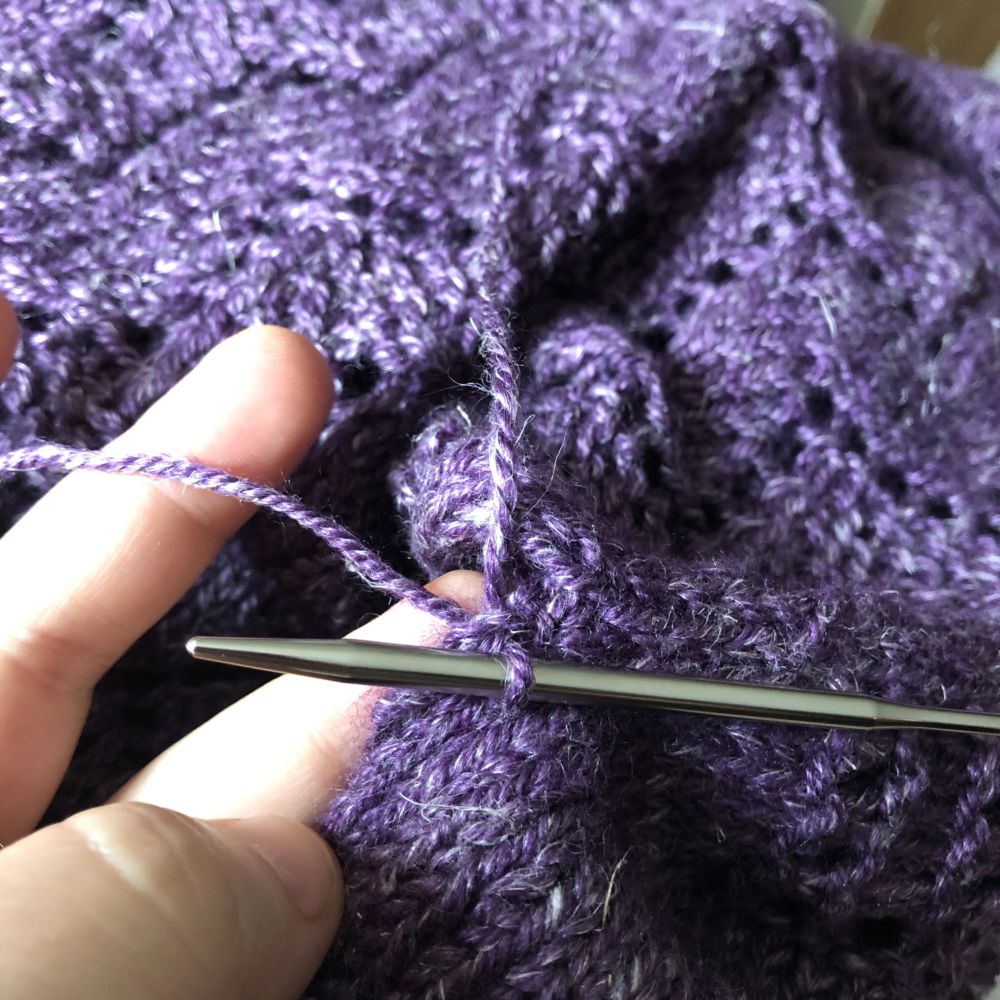
Wrap and pull through a single stitch
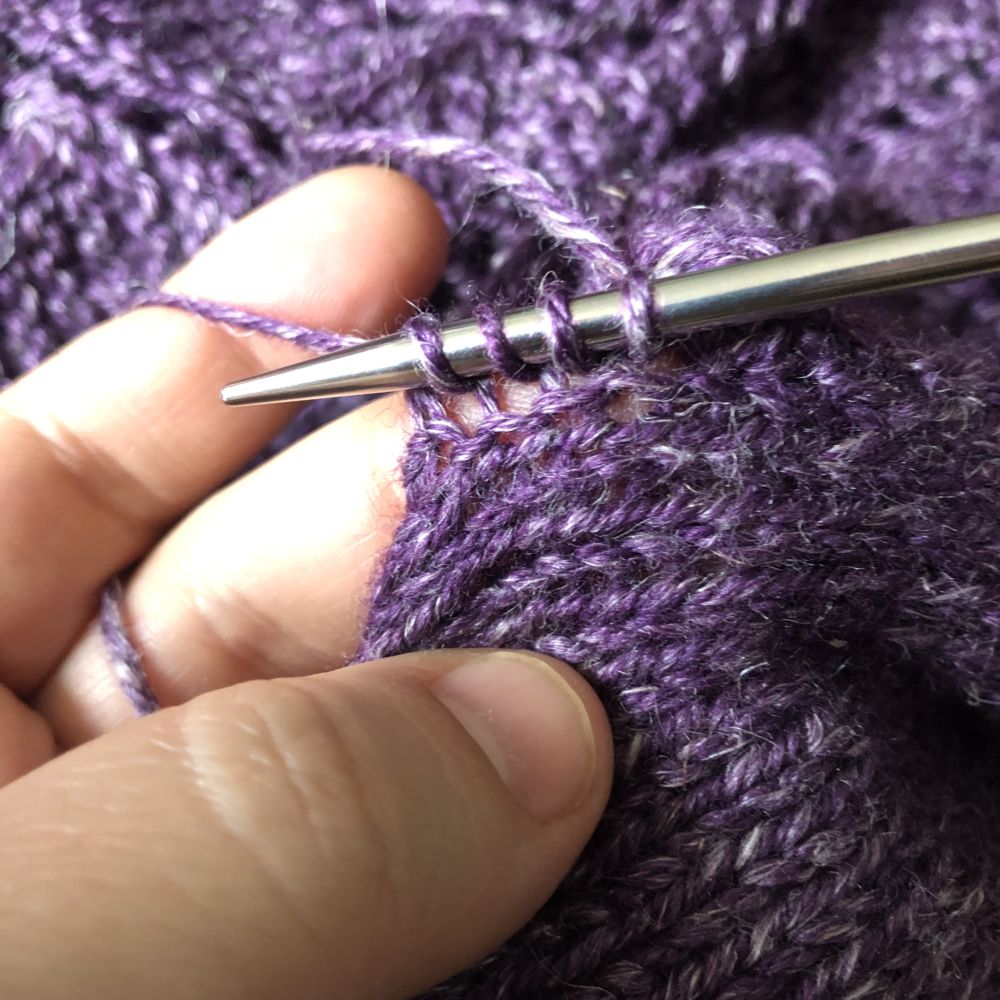
Then working into the hole directly to the left of the just made stitch insert, wrap and pull through one stitch each into the following 3 holes.
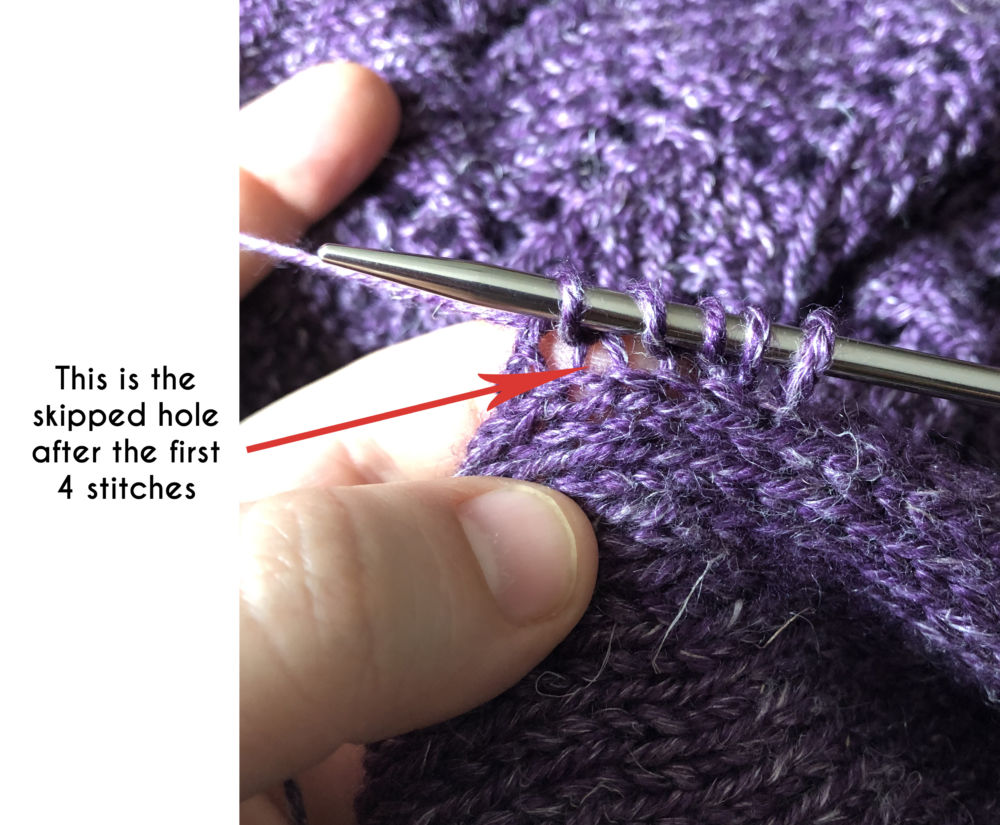
The next hole is the one to be skipped, simple pass over it and work another stitch into the next hole.
As you can see there will be a slight space where you have skipped holes which make counting the sets of stitches easier on the pickup row but will not be noticeable in the finished knitting.
Calculation for My Back Armhole
- 62 total holes – 49 stitches to pickup = 13 holes to skip
- 62 total holes / 13 holes to skip = 4.75
- Minus 1 stitch from this = 3.75
- 75 can’t work so I will use 4 and 3 (but 3.75 is not exactly halfway between 3 and 4 so we will need to manipulate it a bit)
- Alternating between 4 and 3 for 13 sections only gets me to: 46
- 4 skip+3 skip +4 skip +3 skip +4 skip +3 skip +4 skip +3 skip +4 skip +3 skip +4 skip +3 skip +4 skip = 46 sts and 13 skips over 62 holes
- So I will add in the extra 3 stitches needed changing 3 of the 3 stitch sets to 4, I highlighted the ones I changed to 4 in red, just space them out as evenly as possible.
- My final pickups and skips looks like: 4 skip +4 skip +4 skip +3 skip +4 skip +3 skip +4 skip +4 skip +4 skip +3 skip +4 skip +4 skip +4 skip = 49 sts and 13 skips over 62 holes.
Homework
If you would like to keep up with the steps in this knit along, then I invite you to finish one or both sleeves. Lesson 5 will be available on May 10th and will contain information on how to calculate and adjust any the front band for any length changes you made.
Sharing!!
I would LOVE to see photos of your progress on this Knit along, please share photos via Instagram using the hashtags #plymouthknitalong #rosethriftkal you can tag Plymouth Yarn using @plymouthyarn and tag me using @meghanjoneslnmp.
Questions? Comments?
Feel free to leave questions and comments in the comment section of this post, I will respond to questions as quickly as possible as well as add any Frequently Asked Questions to the bottom of this post for reference.

Meghan Jones is a full-time knitwear designer who lives with her husband and 4 children in the Inland Northwest. When she is not knitting she spends her time nurturing obsessions with gardening, cooking, and sharks. You can find more of her work at www.littlenutmegproductions.com on Instagram, Facebook, and Ravelry.


Recent Comments