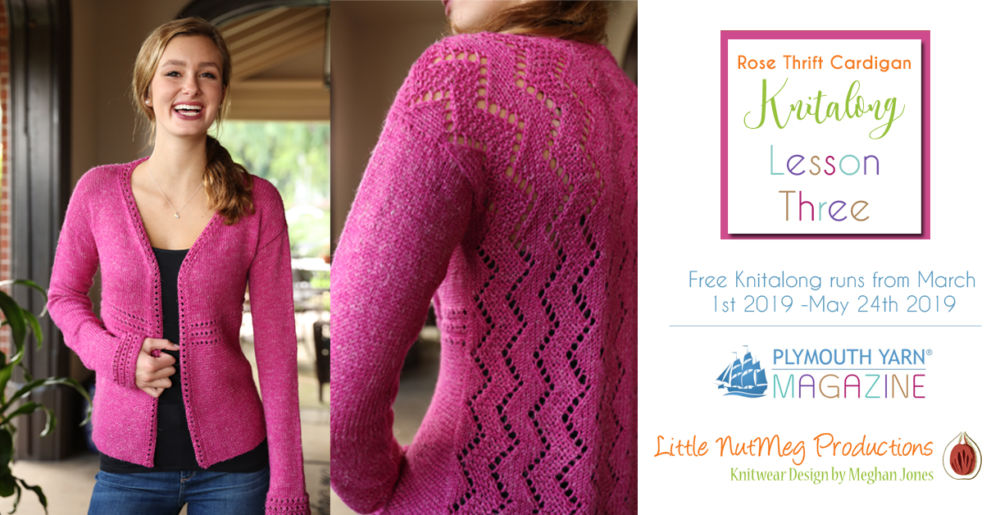
Welcome to the Rose Thrift Cardigan Knit-along
Hosted by Plymouth Yarn Company and Meghan Jones of Little NutMeg Productions.
Join me (Meghan) as we work through every step of the gorgeous Rose Thrift Cardigan from planning to finishing and make yourself (or a friend) a spectacular knitted cardi!
In the First Lesson, we took a look at the schematic, chose what size to knit based on measurements and talked about easy adjustments that could be made with needle sizes. If you missed that lesson, check it out here! LESSON 1
In the Second Lesson, we really delved into sizing for the fronts including changing needle sizes and possibly even changing the stitch counts, as well as where to place the eyelet band and working the garter stitch rows from the blocked swatch. If you missed that lesson check it out here! LESSON 2
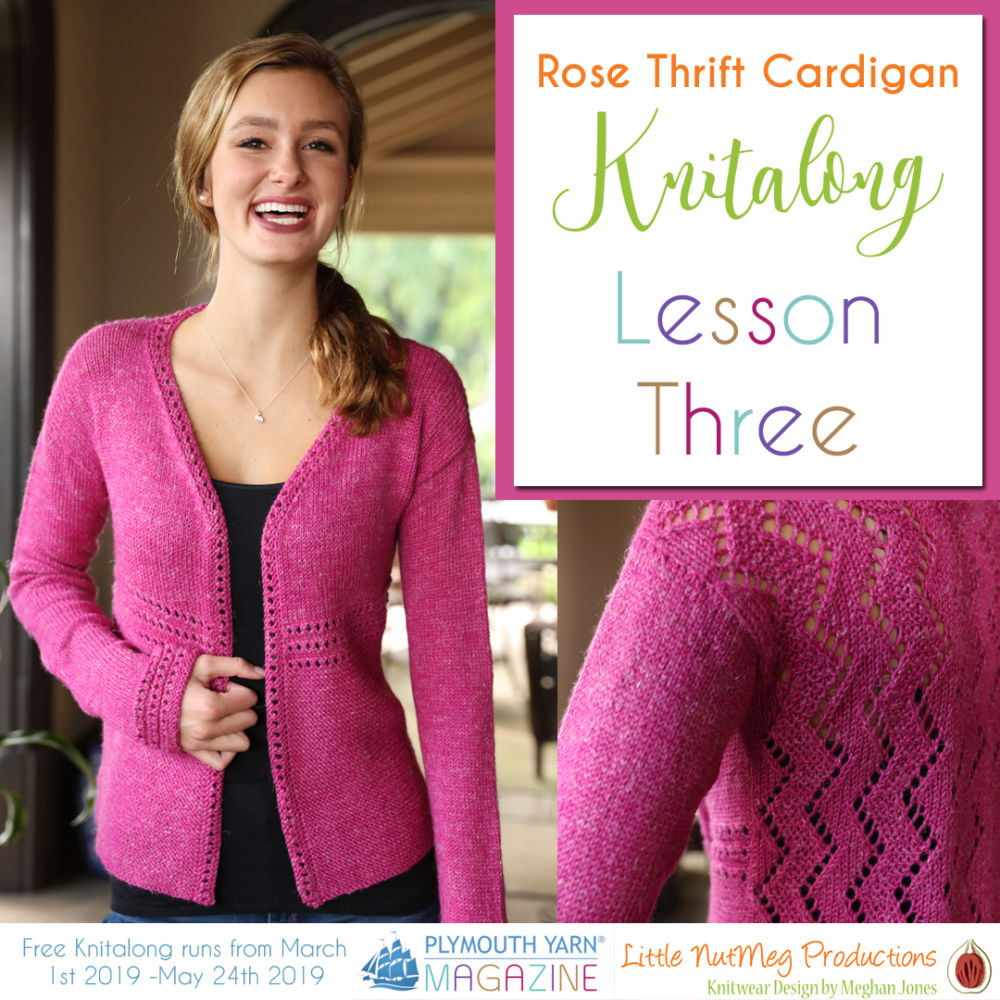
Lesson 3
For this lesson, we will be blocking the fronts and the back to the correct size, and then seaming them together at the side seams and the shoulders.

Blocking
Wait what?! Why are we blocking in the middle of the garment before we have even knit the sleeves? The sleeves for this cardigan are worked from the top down in the round, this means that they need to be picked up from the armhole using double pointed needles. To have an armhole to pick up from we need to seam the fronts to the back and to have the fronts fit the back we need to block all of them. Remember that we used the blocked measurements from the swatches to calculate the length for the fronts and back, so we need to block them before seaming. (If you missed this you need to read Lesson 1 and Lesson 2).
Begin by making sure your sink is clean (I have these two almost teenagers that live upstairs and use the bathroom closest to my studio, and I have learned to never, ever take it for granted that the sink is clean enough to put knitting in).
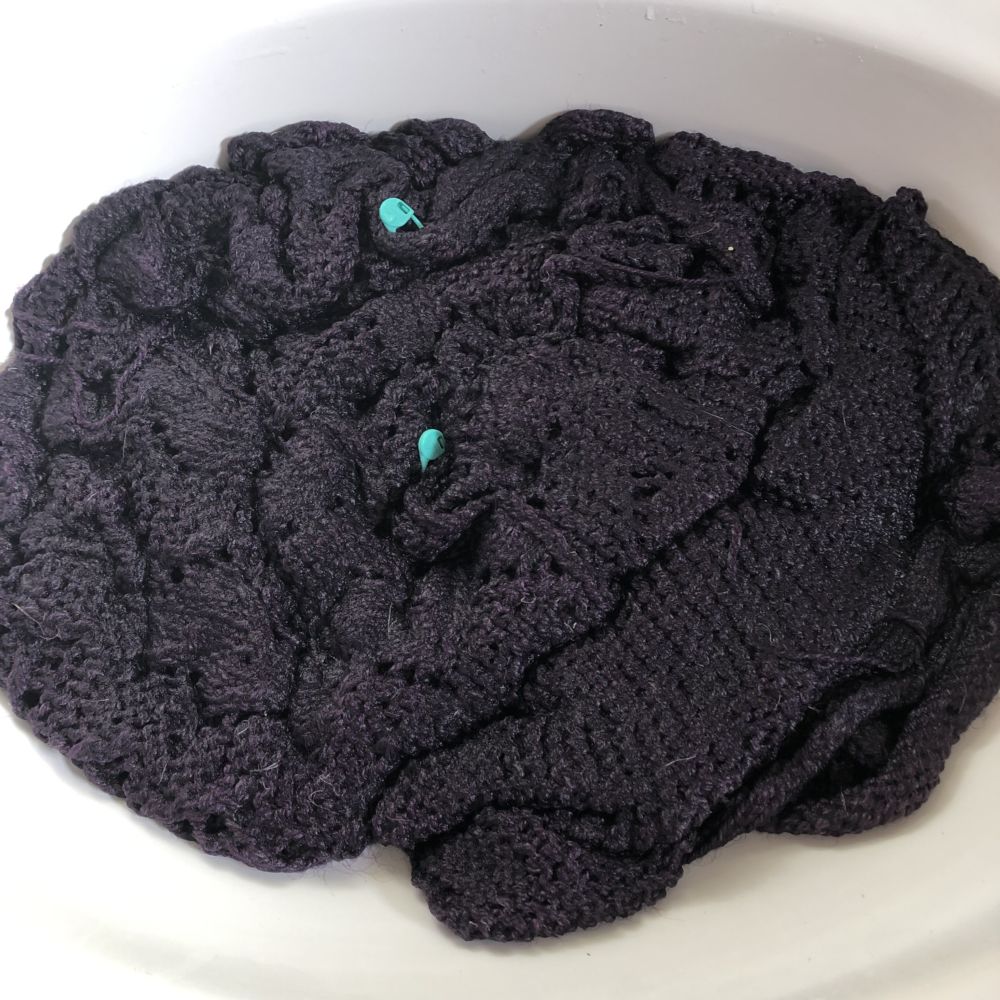
Place your fronts and back into the sink, fill with lukewarm water and allow the knitted pieces to gently absorb the liquid. You can press gently to help the fibers absorb the water but don’t manhandle it. Once they are all fully wet (they will all look to be the same color, no areas of lighter or darker fiber) open the drain, and let the water out. Again you can gently press the knitting but no wringing, twisting or squeezing.
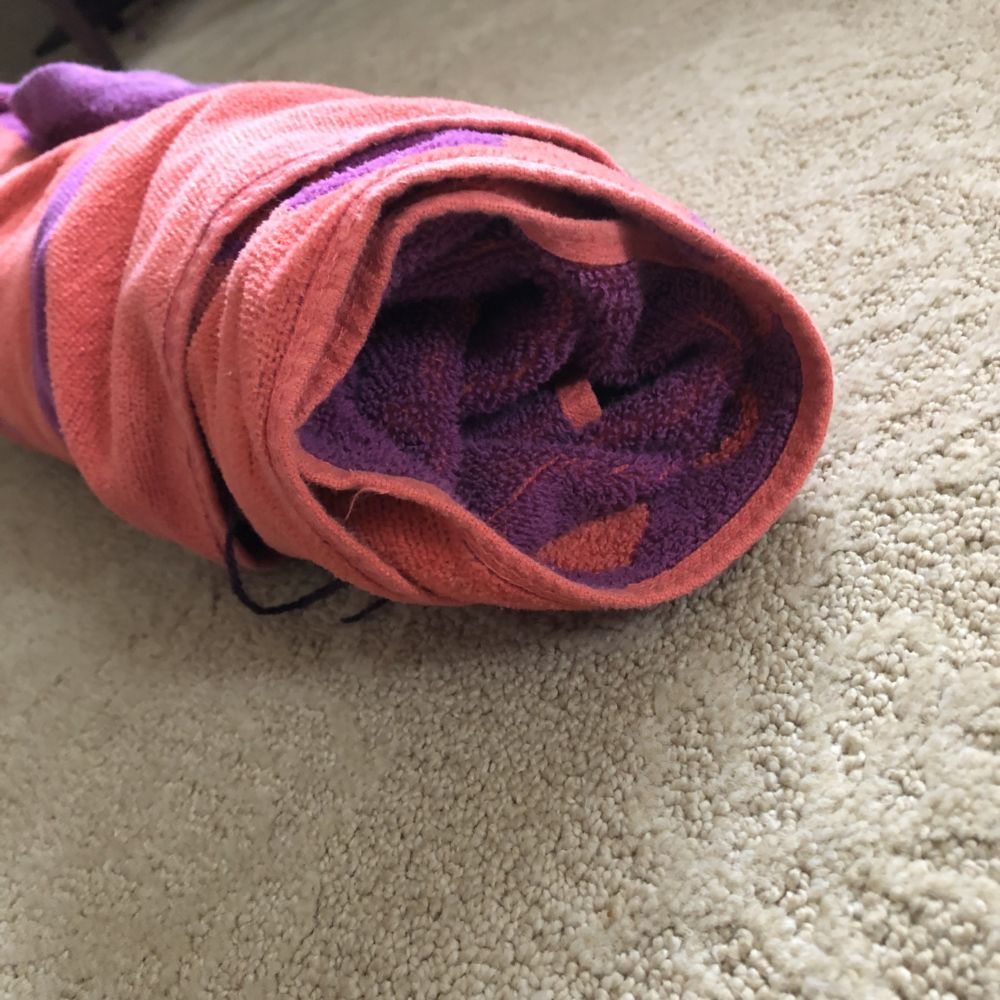
Using a dark towel gently place the knitting onto it spread out a bit and roll into a tube, use a towel that is darker than the yarn you used just in case there is any color transfer. You can gently press on the tube of knitting to remove excess water, and even reroll the knitting into a second towel if you live in a damp climate as this can help to remove as much excess water as possible.
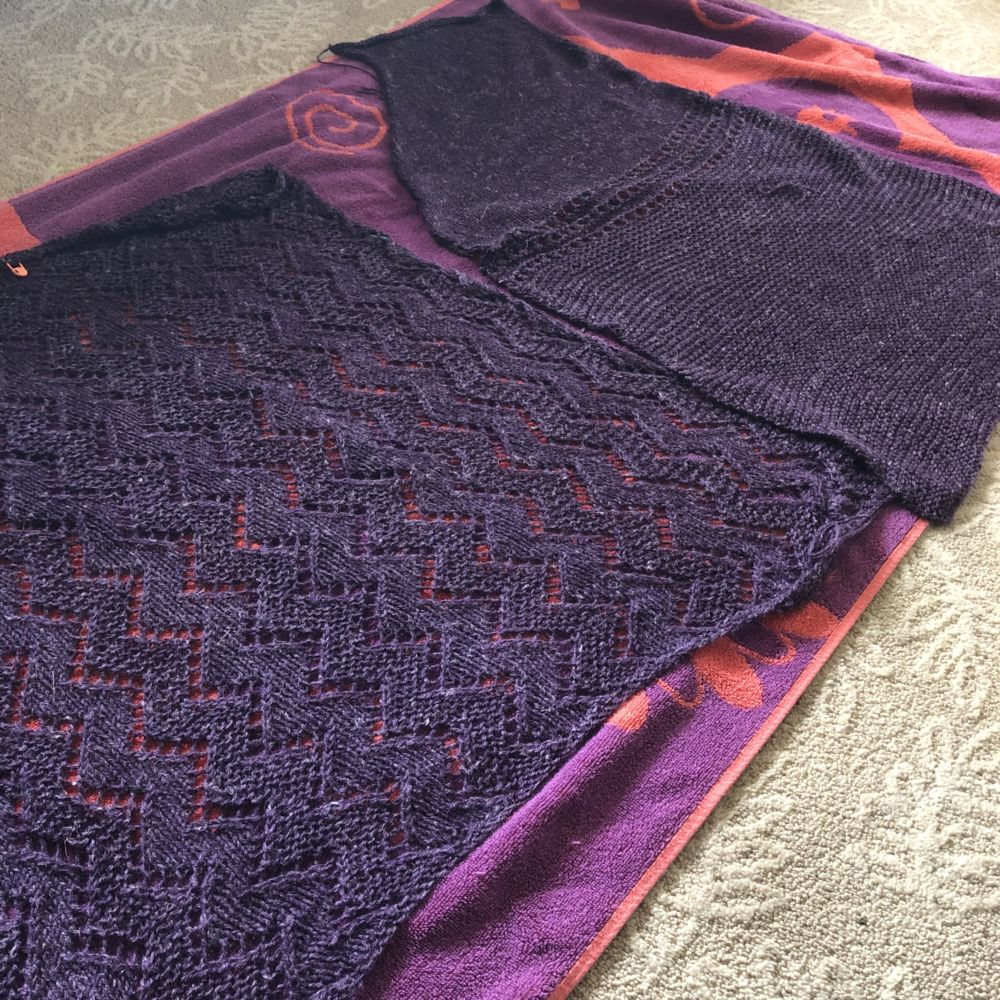
Now using a tape measure and your schematic lay the pieces out on the floor or a bed to the size indicated by my measurements in the finished pattern or your measurements for any altered pieces. Leave to dry, if you live in a damp climate it helps to place a fan in the room aimed at the knitting to help it dry faster.
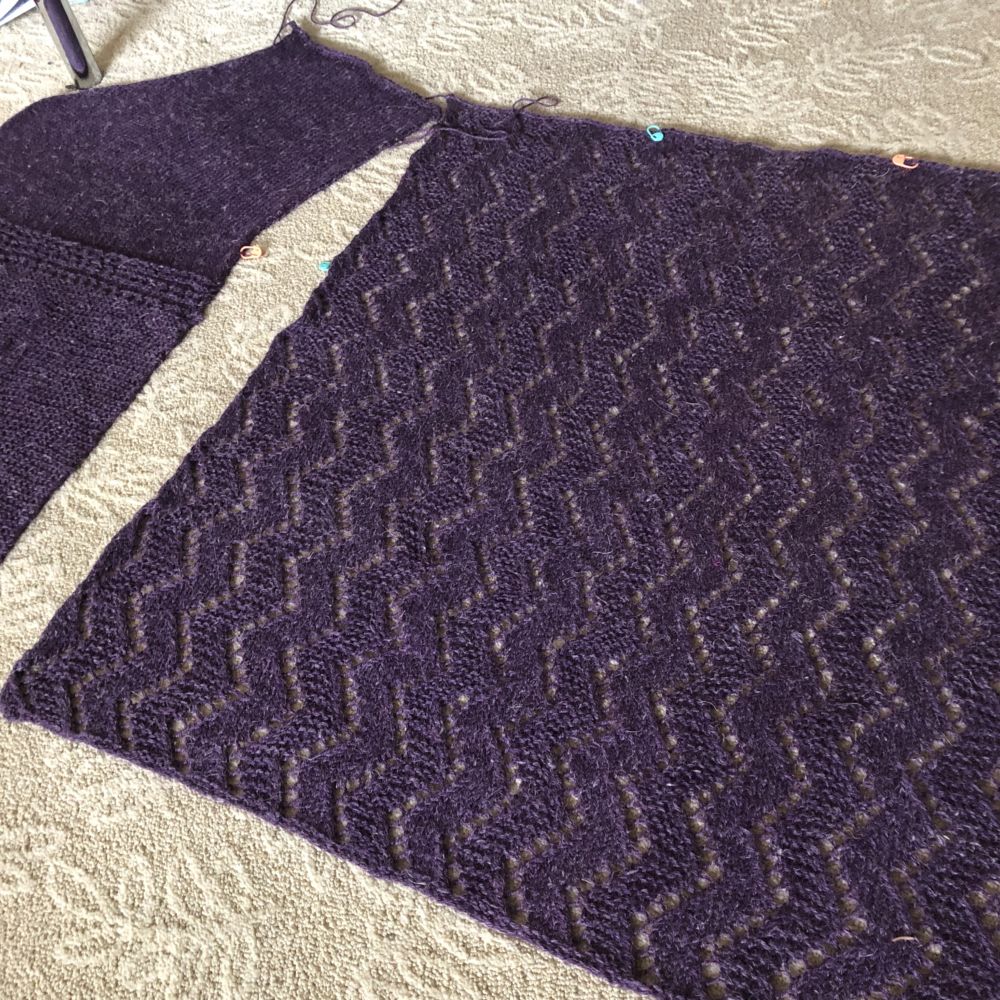
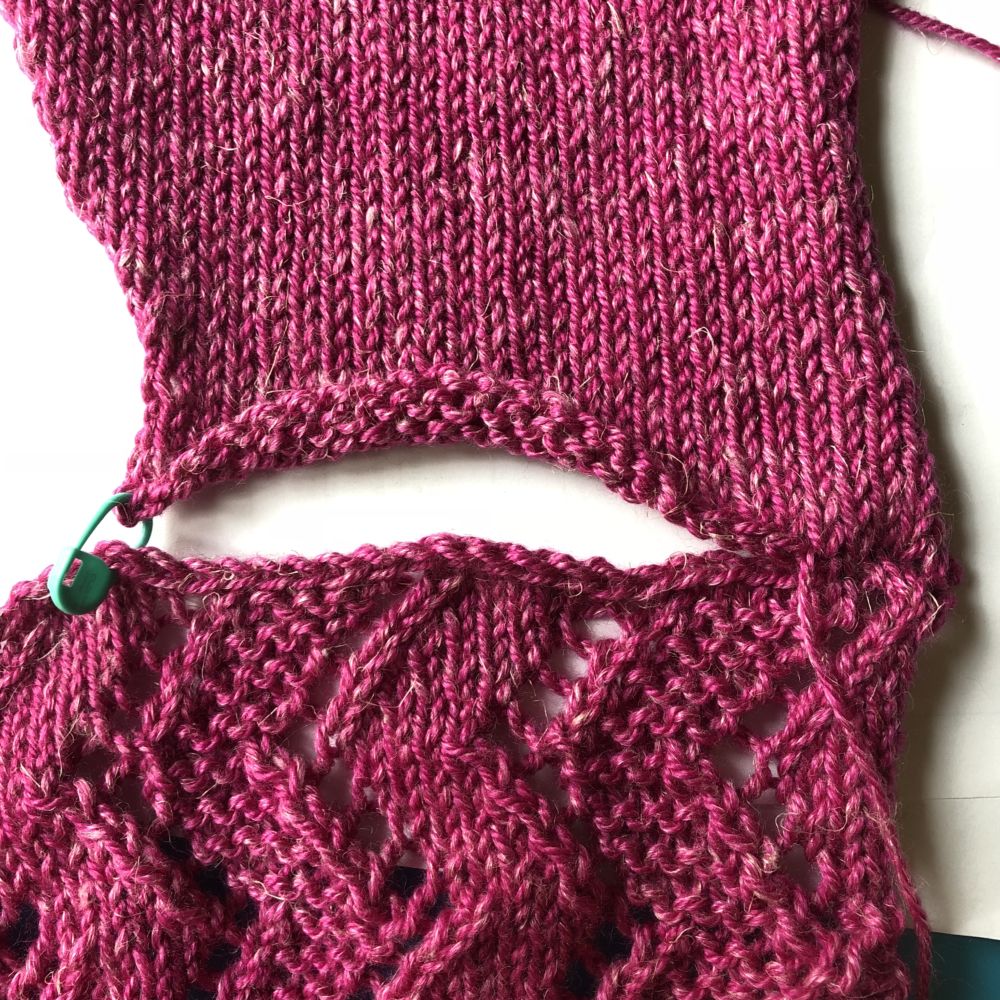
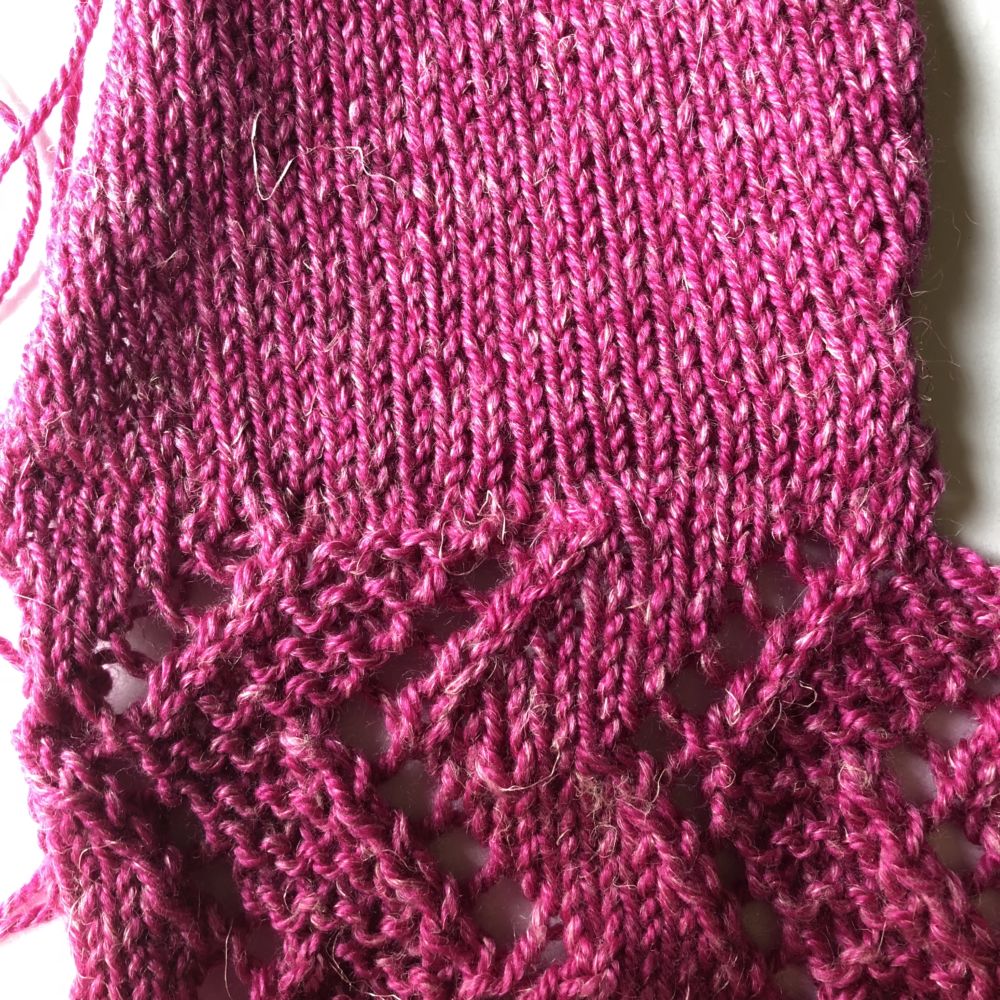
As you can see it helps to block the back and sides beside each other aligning the hems and armhole markers. If you added short rows like I did you can see that the armhole on the front is angled slightly since I added a wedge of stitches at the front opening to accommodate my bust. You can also see that the upper body on the back is slightly narrower since I used a smal
Seaming the Shoulders
If you used the gauge stated on the pattern and knit to the specified measurements then your front shoulder width should fit into the shoulder space indicated by the marker left in the bind off on the back.
If you adjusted your upper back by using a smaller or larger needle size, or adjusted your front shoulder in any way you will need to manipulate how the backs and front work together. I used a smaller needle size for the upper back and so my upper back is 26 ½ instead of 27 ¾ this is a difference of 1 ¼ inches. This means that my front shoulders will sit just over half an inch over the marker on my back bind off, and my neckline is about 1 inch narrower than indicated. I could have worked an additional 2 decreases to offset this on the front, but I chose not to as it seemed like a negligible amount. If you went down a needle size for the upper back and are not finished the fronts you could always used a smaller needle size for the last inch of knitting on each front.
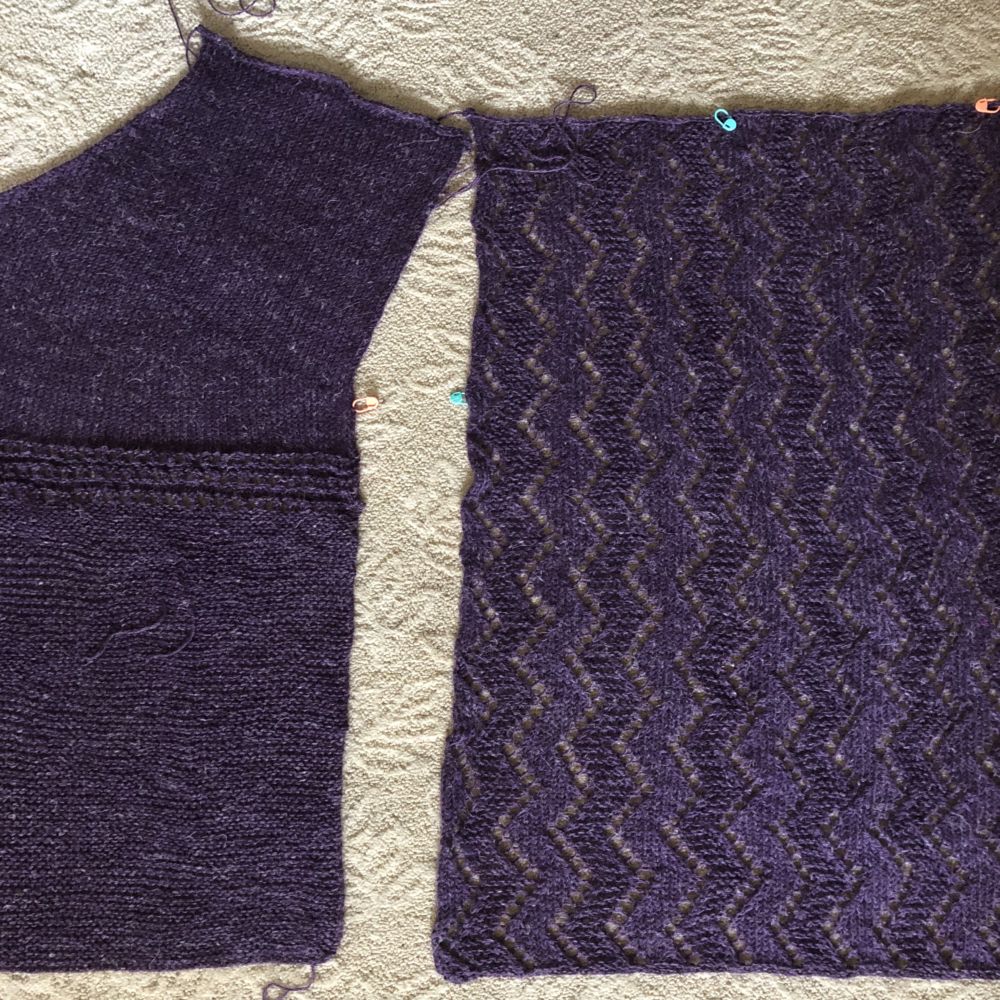
The trick with seaming these shoulders is that there are more stitches on the fronts than there are on the back, this is because the back needs fewer stitches worked over the lace pattern to make the same amount of space. So we will work some fancy stitching to get the same look as a nicely seamed shoulder with the same number of stitches, and we will actually write this seam out like a row of knitting.
Count the stitches that are to be seamed on the front shoulder and the back shoulder, you will need the difference between these two numbers to calculate how many double joins to work.
The back shoulder for the first size of the Rose Thrift Cardigan has 25 sts and the front shoulder has 28 sts, that means there is a difference of 3 sts.
- Take the smaller number and divide it by the stitch difference = 25 sts / 3 double joins = one double join happens approx 8 stitches,
- Minus 1 stitch from this number to use for the double join = 6
So far we have a seam that looks like: Work 6 even, work 1 double join, work 6 even, work 1 double join, work 6 even, work 1 double join = 21 sts
3 sts remain unused, add them at the end, so you don’t have a double join right at the edge.
Now our seam looks like: Work 6 even, work 1 double join, work 6 even, work 1 double join, work 6 even, work 1 double join, work 3 even = 25 sts
And to even out the beginning and end stitch sets lets go with 4 and 5 stitches even instead of 6 and 3.
Our final seam looks like: Work 4 even, work 1 double join, work 6 even, work 1 double join, work 6 even, work 1 double join, work 5 even = 25 sts
Lay your pieces on a table or flat surface with rights sides facing up, the back at the bottom and the front at the top. Using removable markers pin the fronts to the back, get a length of yarn loaded up onto a yarn needle. Work your first set of even stitches, if you need a refresher on how to join your knitting for a seamless look click here How to: Read Your Knitting for Perfect Seams
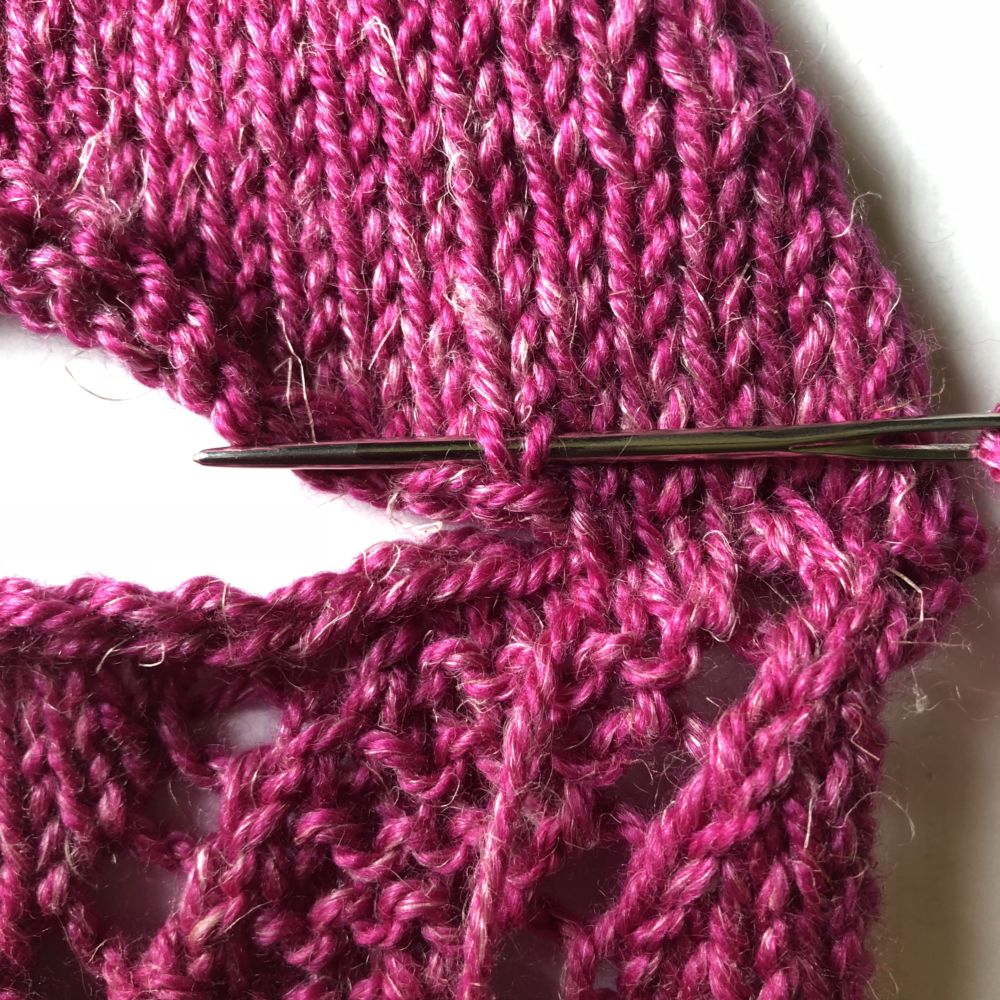
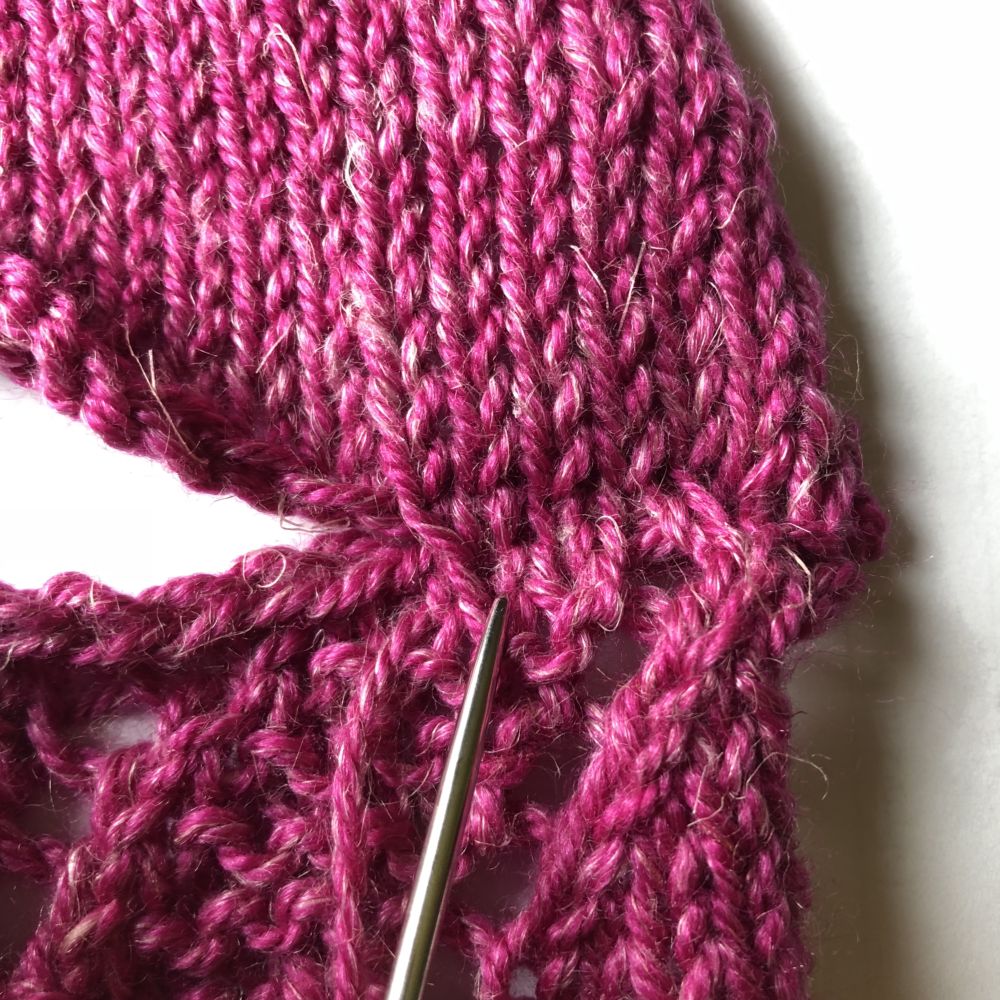
Now for the double join, bring the needle down into the ‘V’ on the next bottom stitch and up out of the ‘V’ on the following stitch moving to the left.
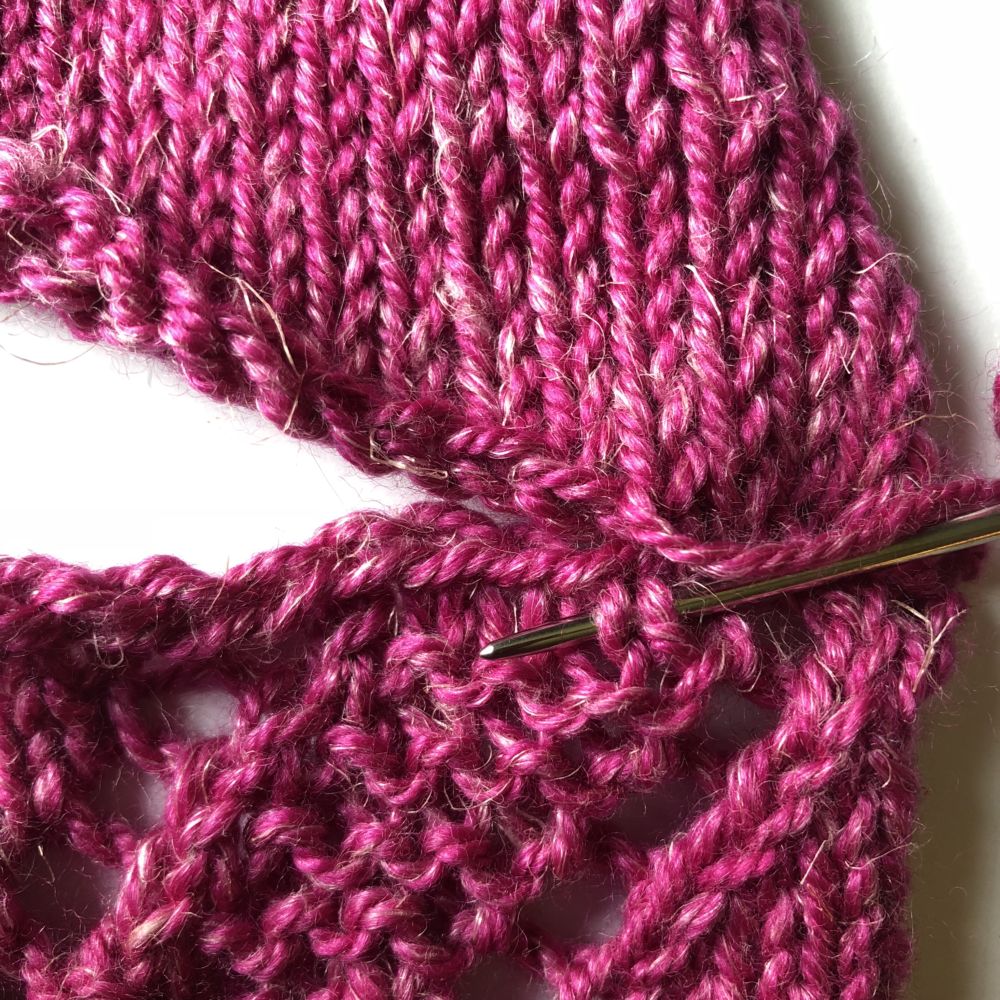
Bring the yarn needle behind both ‘V’ legs of the next stitch on the upper piece (the front shoulder)
Now bring the yarn needle down into the ‘V’ of the next bottom stitch, but bring it out beside the ‘V’, grabbing only one leg of stitches.
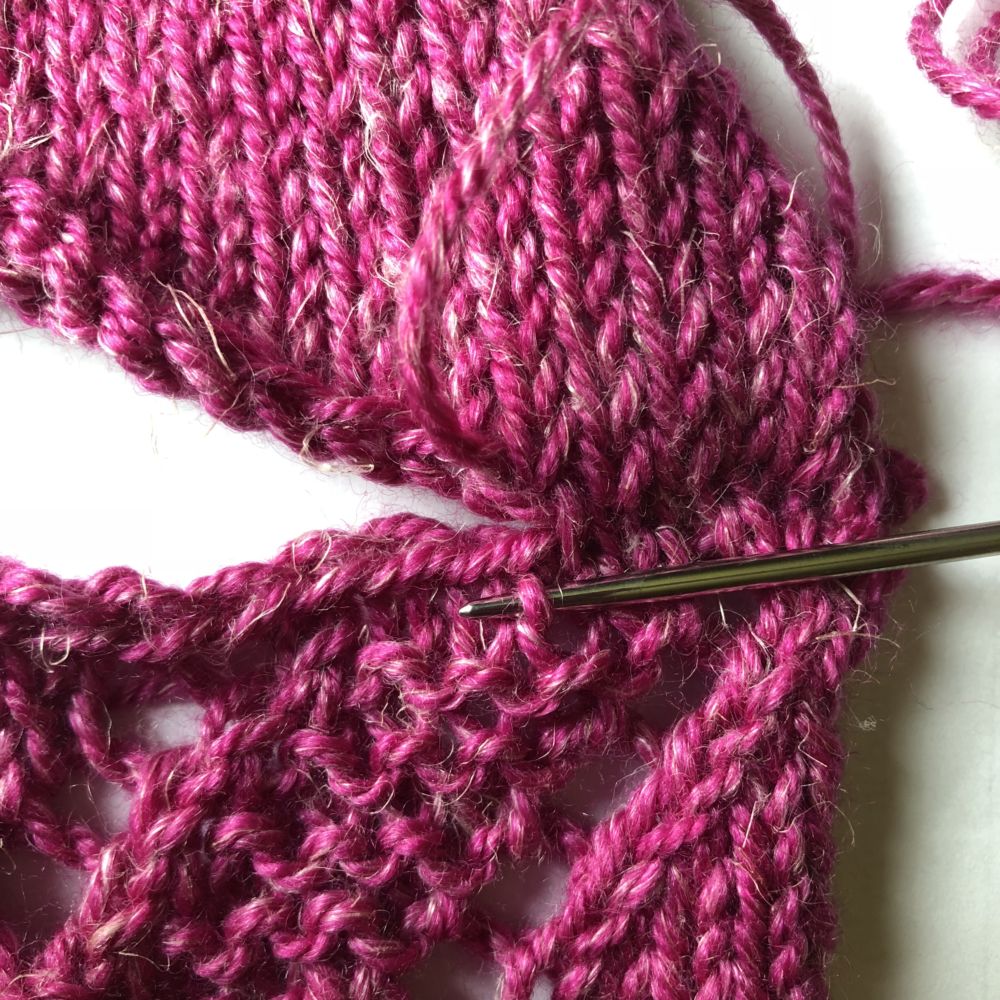
As you can see the yarn tail comes out beside the ‘V’, not from the center of the ‘V’
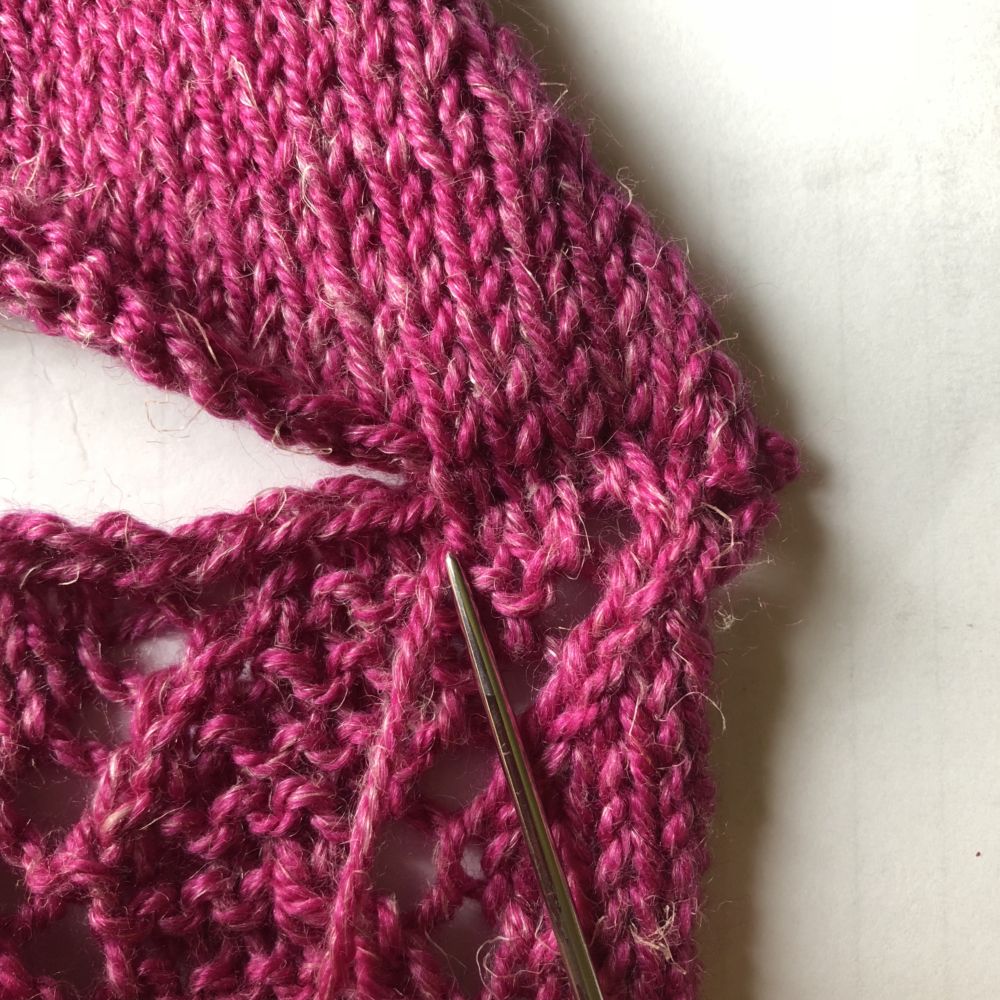
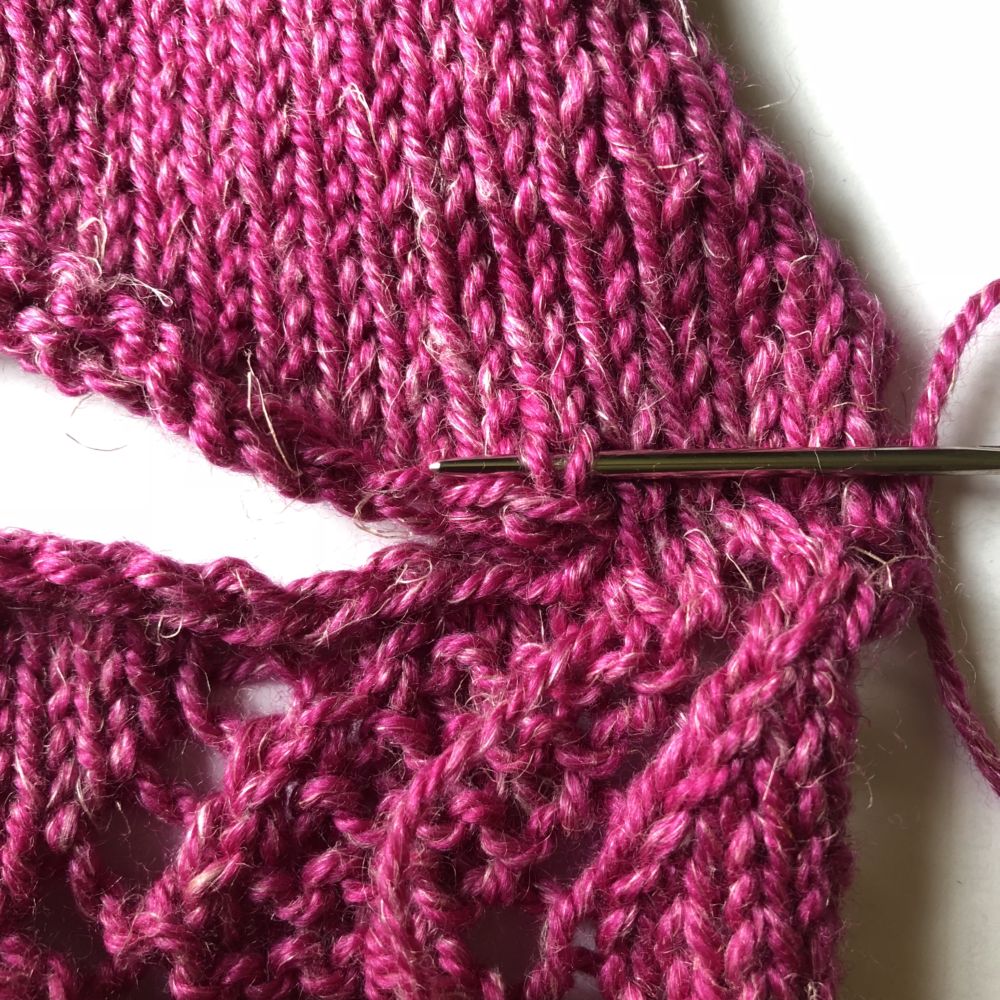
Returning to the upper section (front shoulder) bring yarn behind both ‘V’ legs of the next stitch.
Now on the bottom (back shoulder) insert the needle back into the same ‘V’ as the last time, but this time come out of the ‘V’ on the next stitch to the left. You can see the yarn from the previous row coming out from between the two ‘V’s just above the needle in this shot.
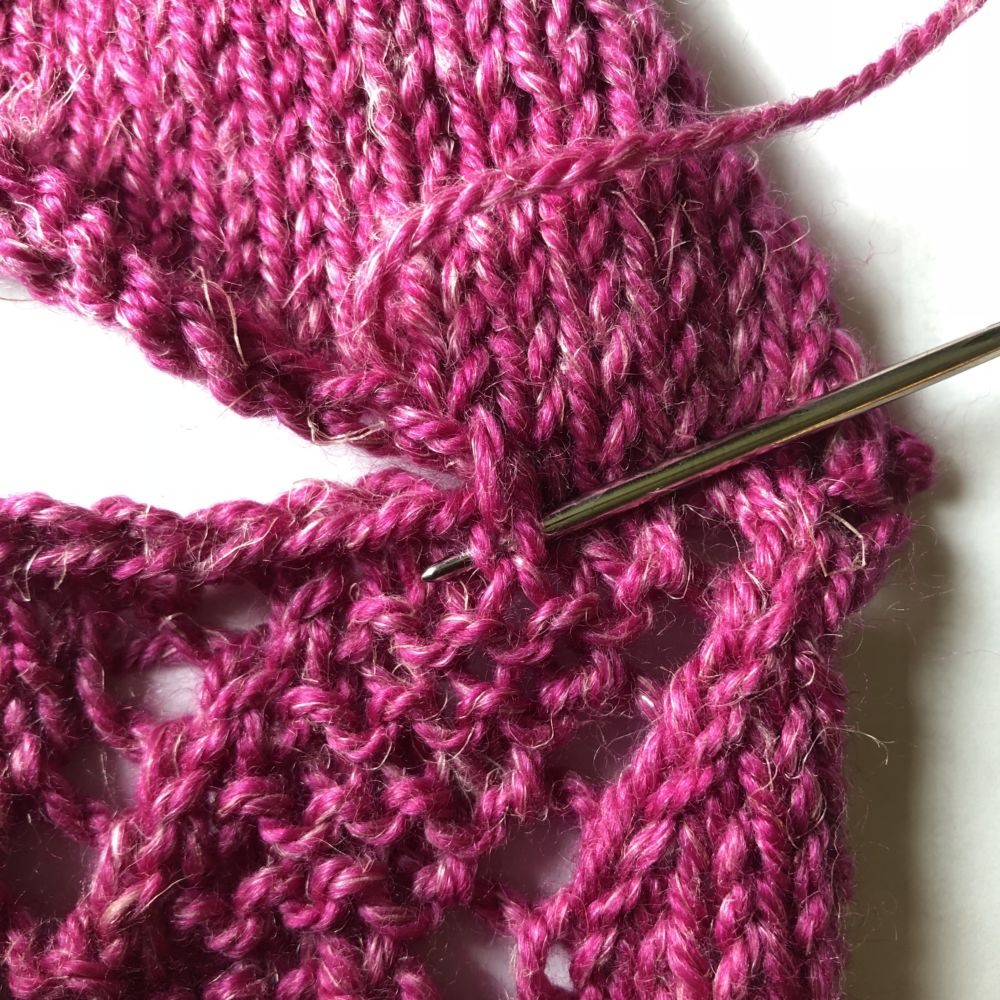
You can now see the two ‘V’ stitches from the top piece (front shoulder) that have been seamed into and are emanating out from the single ‘V’ stitch on the bottom piece (the back shoulder).
Continue working across your calculated seaming row with the needed number of single seamed stitches and double seamed stitches.
Seaming the Sides
Once both of your shoulders are seamed you will want to seam the sides in preparation for working the sleeves. Begin by folding the sweater at the shoulders so that the markers for the armhole depth line up. Using removable markers ‘pin’ the sides together with a marker every 3 inches or so. Seam using mattress stitch, a yarn needle and a length of yarn.
Homework
If you would like to keep up with the steps in this knit along, then I invite you to finish the blocking and seaming. Lesson 4 will be published on April 19th and will contain information on how to double check the sleeve length for your size, this is especially important if you changed the upper back size in any way, or desire a different length for the finished sleeves.
Sharing!!
I would LOVE to see photos of your progress on this Knit along, please share photos via Instagram using the hashtags #plymouthknitalong #rosethriftkal you can tag Plymouth Yarn using @plymouthyarn and tag me using @meghanjoneslnmp.
Questions? Comments?
Feel free to leave questions and comments in the comment section of this post, I will respond to questions as quickly as possible as well as add any Frequently Asked Questions to the bottom of this post for reference.

Meghan Jones is a full-time knitwear designer who lives with her husband and 4 children in the Inland Northwest. When she is not knitting she spends her time nurturing obsessions with gardening, cooking, and sharks. You can find more of her work at www.littlenutmegproductions.com on Instagram, Facebook, and Ravelry.


Recent Comments